...is the process by which we create, discover, learn and grow with those we cherish most.

.
Showing posts with label Create. Show all posts

Ramadan paper lanterns

Ramadan paper lanterns

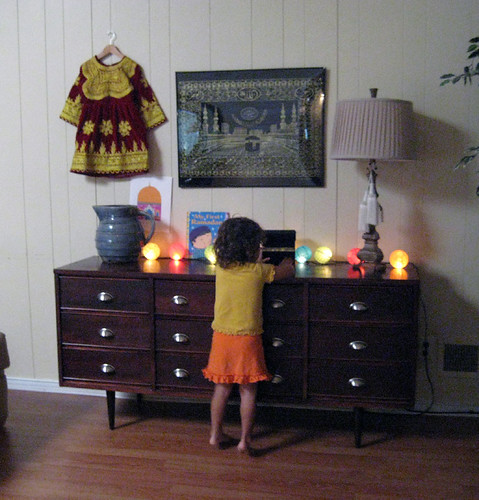
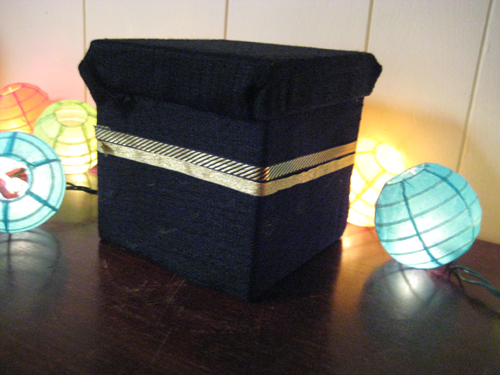
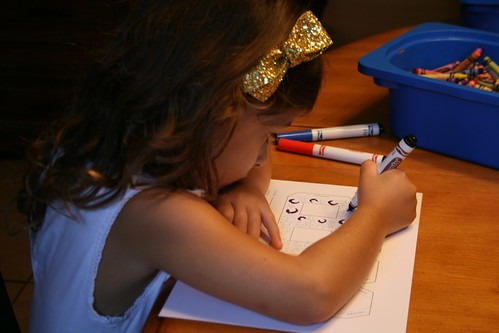
Lots of wonderful craft ideas out there to get the kiddos involved with the celebrations of Ramadan. Lanterns are commonly used to light up and decorate the streets at night - when everyone is out. But at home, this works just as well for us to decorate our table with.

Ramadan paper lanterns

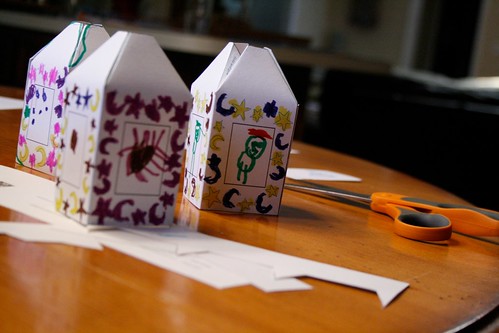
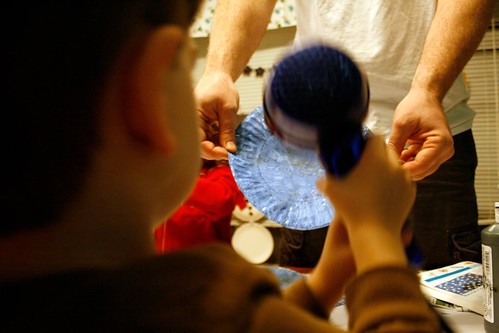
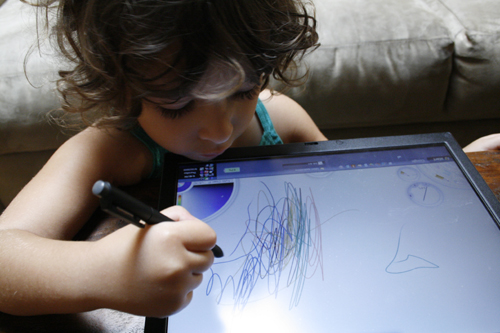
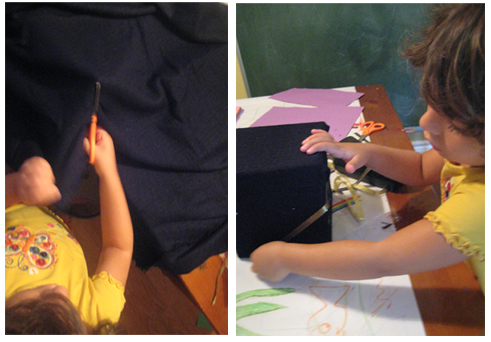
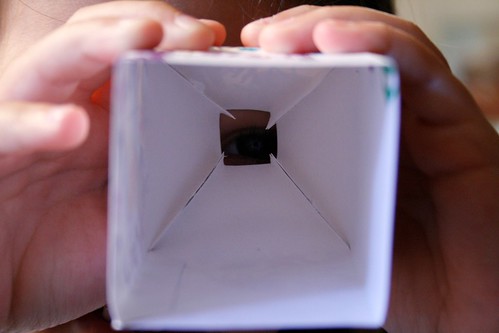
We used a template from Smart Ark. The glue stick didn't work too well - so I eventually had to pull out the masking tape and add some to the tabs from the inside. You're suppose to cut out the squares on the inside so that when these are attached to a string of lights, they can show through. But we used ours to decorate our kitchen table... and of course, pretend they were telescopes for a bit...

Ramadan paper lanterns

More great ideas on Smart Ark's fun page...

just a cardboard box

broadcasting

Oh... the simple joys of a playing with a cardboard box! Ava came into the bedroom wanting to tell me about the weather - in a very reportedly way. So I found her empty radio box in the garage, cut out a "screen" and put it over her head. And just like that, she was reporting the weather from the tube. Its quite funny hearing her interpret the news - since we don't watch it at home. But she described the sunny day ahead very vividly, and flipped her "paper" to move on to the next topic.

The "TV" didn't have to be painted, or fancied up - kids see past these so quickly so that they can focus on the good stuff - the fun! With just a little creativity with what you already have at home (no store bought stuff) playtime using our imaginations - is indeed priceless. You might want to also grab your video camera too - oh the things they say....

3 techniques, 2 days, 1 mr. seahorse

Inspired by this assignment from Deep Space Sparkle - a fantastic art blog - we set out to produce artwork like the great Eric Carle too. I thought this would be a fun project to try on this summer day - because A&N love Mr. Seahorse and it brings back memories of our beach trip.  The layers, techniques, and two-day process was part of the beauty of this art project. Most of the time when kids do "art" they have an idea in mind. Here, they discovered how "art" itself can be pieced together - to make even bigger art.

Jump over to our Creative Crafting corner to see how this:

Mr. Seahorse

turned into this:
Mr. Seahorse

Don't forget to jump over here!

setting sail

paper boats

Who needs pool toys, when you can sail a boat? To change things up a bit during splash time, Ava and I made 20 paper boats with the stack of square fluorescent note sheets we had at home. I can't remember how old I was or who taught me how to make a boat, but after looking online to link for this post, I realized I do it a little bit differently. I'll have to share that with you in a second post. After doing it just once, Ava was able to make some of her own... and then we played the voices of the ships preparing to hit the high seas...

lesson plan - spring, windy, rainy day

Sunday nights, I try to hide in the children's art room and draft a lesson plan for the week. We were anticipating rain, so I found a few craft projects the kids could do. But first, I had to make our Spring tree {made with just large sheets of brown construction paper}. I also cut out green leaves and placed these in a small tray - each time the kids complete an activity, we can write on the leaf what they learned about "Spring" and add it to our tree {my hope is that it'll "bloom" before summer!}

Spring Tree

Index cards with weather pictures are taped to the mirror on the side so that the kids can observe and talk about the weather... Today, it was...

Signs

Rain is in the forecast, so we started an umbrella art project.

Umbrellas

For the full scoop on how to do this sticky umbrella art project and what they look like finished, see our Creative Crafting Corner.

Umbrellas

Lesson Plan

Onto the rest of our lesson plan... I read Charlotte's Web and The Very Busy Spider and made spiders of our own with colorful pipe cleaners and googly-eyes...

Itsy Bitsy Spider

Itsy Bitsy Spider

The kids practiced their worksheets found in their baskets {I cut theme-related sheets out from their preschool workbooks} focusing on the colors red and orange, and cutting and pasting the shapes rectangles and squares. I really like how organized the day was. Not everything had to be written down in the lesson plan book either {that would have drove me insane}. Instead, we let the day open itself up for learning opportunities around us. Like when we were in the backyard, Noah went through a web and he felt a "string" stick to his arm... or when he played with his ambulance and police cars - and he noticed the "rectangle" shapes... oh yes, learning is everywhere...

How do you organize your learning day? Do you start out with a theme? The weather?

lambs... and lions... oh my!

An easy lamb/lion double-mask the kids will flip over. Plus it took less than 10 minutes. Details and photos on Creative Crafting

lambs-lions

dinosaur dioramas


Dinosaur Project @ N&S

Making diorama's is by far one of my favorite art projects to do with the kids. There's something about its smallness that makes me want to crawl inside. I can still remember the the very first time I saw a diorama put together - Dad worked on it for a school project for my sister. And I was mesmerized by the detail of the cutting, gluing, and layering. He made a library. And oh... I wish we still had it. The kids put together a dinosaur diorama - jump over to our craft page to see the process.

paper blue bird in 30 minutes

quick dry

Some days are hectic, and we can run through an entire day and not create anything in the art room. When that happens - usually after dinner - all the kids will want to do is plop in front of the TV and call it a "movie night." Problem is we just had a few - two in a row. So this is when both Aaron and I both sit down in the art room {the kids naturally follow} and we look through our craft books for a quick project. Since Aaron picked up some extra paper plates from the local pizzeria tonight, we decided to make a paper plate blue bird.

Find out how it turned out here, on The Art of Family Crafting blog or by clicking on the Crafting Corner box on the right, where we'll be posting all of our creative art projects.

p.s: although we had a craft night instead of a movie night, while we were painting our plates blue, I asked the kids to tell me what other things are blue. Each said, "Thomas, Jay Jay, Dora's crystal..." all cartoon characters!

{sighing} well, at least I tried....

art project: secret playhouse

It's not often that Ava asks for us to buy something she sees in a store {except for candy} so when she spotted this cardboard playhouse, Aaron and I thought it'd be a fun project we could all do together. The entire house was simply "unfolded" and then attached together by the chimney - and just like that, the little ones scurried in and out of the house with their toys.

Playhouse

thankful wreaths

Thankful Wreaths

After a walk in the neighborhood collecting leaves and acorns, A & N made thankful wreaths in the art room. We are thankful every day - and attempt to share these at the dinner table - but this is one way to capture them into an activity, and for the scrapbooks.

What Ava is Thankful For

Ava is practicing her writing, so she wrote this herself: What Ava is Thankful for: Mom, Family, Dad, The World, Disney Princess, Noah, Friends, Hana & Niko.
{Drats - the "Disney Princesses" made it onto this list!}

What Noah is Thankful For

What Noah is Thankful for: My whole Family, ice cream, Dad, Trains & Trucks, Zoe, Bike, Ava, Mom, Cars.

Such a sweet snapshot of what the kids are thinking about isn't it? It made me realize that the wreath was too small for this type of project. Next fall... we're going to work on making a tree to fill with "thankful" leaves, so the kids could add to it through out the season. Or better yet, now that I'm thinking about it out loud - we should start on the first day of Spring - when life returns back into nature. We could keep adding to it throughout the year, and come next Thanksgiving, reflect on everything the kids are thankful for... Oh yes - I'm liking this idea much better. Now hold me to it!

For this quick activity - all you need is colorful construction paper, a paper plate, some glue, and markers. This is perfect for the kids to do while you're preparing your Thanksgiving spreads, or afterwards as a family. Enjoy!

art party - memorable take home favors

I have a soft spot for party favors. From baby showers to weddings, favors are those little gems that guests take home as a memento from the wonderful occasion. I can still remember the party favor I received from the first birthday party I ever attended as a child. I think it's such a wonderful way to make every child feel special and included to receive a gift at a birthday party - and not just the birthday girl.

It was inevitable that the container to use for the favors had to be paint cans. I found these clear ones online, and ordered a box set - for under $2 a piece. Fill the bottom with shredded color paper, add candy and trinkets you find at your local party store. I included a stamp set and jar of bubbles.

favors3

favors 4

I was exceptionally ecstatic to find Pop Rocks candy with actual paint rollers for dipping - that I went to two stores to get enough for the favors.

favors6

For the "thank you" message, I picked up some fun colorful paint sample chips (Home Depot) and glued them together to create a paint deck of 4 colors- then clipped them to the side of the handle. To prop the handle up so that the kids could grab the container, I inserted foam paint rollers (in the center and tied it with streamers.

favors

And of course, while I don't mind sending kids home with more sugar and candy - I thought it would be fair to also send them home with a trousseu of art supplies to create master pieces of their own.

guest party favors


Art Party Guest Favors - Our Tips
1. Favors are no doubt an extra expense. A simple notebook with watercolors wrapped together with a beautiful bow would be fantastic giveaway too! Depending on the amount of children you are hosting, splurge on what you feel is right. But don't forget to include something nonperishable too - like a paint brush, or personalized apron.

And if you shop throughout the year and collect some pieces during sales, you'll find yourself inspired to create memorable guest favors long after the party is over. Except for the candy - every thing can be reused - which parents love!

Our favors ran approx $10 each, but we planned ahead for that - since we only had 6 to make.


Have a favor idea? Please share your ideas here...

laptop art

Our art corner has currently taken residence in Noah's bedroom, which complicates matters during Noah's naptime. So Ava sometimes finds herself in the living room, or my office, to get creative. I sometimes let her sit on my lap and type on the keyboard. She'll type her numbers 1-10 [she even figured out the 1 and 0 made 10 on her own!]. Or she'll use Aaron's swively tablet laptop to doodle some fancy art... experimenting with the options of colors and brushes with her "digital pen."

Ava's Laptop Art2

On this particular morning, Ava ran into my office and said, "check your email Mommy" and then zoomed back out -- "email!" oh my -- and this is what I found :-)

Ava's Laptop Art

Ramadan Craft

I started a Ramadan table in our family room -- a natural transition for us -- as I frequently change its display based on the season, holiday, and even my moods -- usually with fresh flowers and various found objects and pictures. I anticipate the "look" will evolve through the course of the month, and years for that matter, as we create and inherit new things, to artfully display what's going on in our lives.

Ramadan Table

Our latest addition to the table is a minature
Kaba box. Using what we already had, "God's house" was completed in less than 20 minutes. The process was very spiritual for me, as I explained a little bit of background history and heard Ava ask, "How does God fit in there?"

Craft-Kaba

Ava cut the fabric while I held it for her - she's getting soo good with scissors! I tought her how to "measure" the ribbon around the box so that she'd know how much to cut, and she also glued and reglued the ribbons until they were Ava-perfectly aligned.

Since the gift box we used had a lid, I decided to also make it into our
zakat box - which means it'll also house our children's giving to charity for Ramadan. Ava has grasped the concept of money and what it's used for - but the numbers and president faces have no value to her yet. [She still charges me 50 cents for everything I buy in our play store]. But evenso, it's never too early to introduce giving as a way of life... And now we have just the perfect box to help us do so...

Kaba Box

When Aaron came home, she showed off her new project. He praised her work and handed her a few dollar bills. When I asked her again what the money was being saved for she said, "to keep God warm."

Oh, yes... She understands the concept - even more than me - just beautifully....

Ramadan Calendar

I remember creating chain links in elementary school to decorate our classroom for the holidays. It's fun, easy, and oh my - you get to use a stapler! There's something about homemade decorations that truly make an artful display. So when I found this idea on one of many blog sites for children's Ramadan activities - I was thrilled.

Aaron cut out our strips of construction paper and the kids got busy...

Chain Link Calendar

It was fun to see them work together, choosing which colors should go next, and even helping to shape the loops while I stapled them. The idea is to remove one loop for each day of Ramadan - to let the kids visually anticipate and feel the last day of Ramadan nearing, when we will celebrate our Eid festivities.

Chain Link Calendar

For more creative Ramadan craft ideas, visit these sites:

eHow - How to Plan For Ramadan Activities For Family and Kids

Crayola - Coloring pages and crafts

Holiday Arts & Crafts - Ramadan Coloring Pictures

Our Seeds - Fun list of activities

Ramadan Joy - Cards, banners and more

storyboard made from recyclable materials

Art projects are a norm around our house. And with an abundant of resources on making crafts online and in books, I sometimes find myself completely empty on ideas. But that doesn't stop us from completely inventing one of our own. Today, Ava and I snatched the top of our pizza box and decided to make a board game.

Collage

After we sketched the traveling path, we flipped through old issues of Parent magazines and started clipping. I worked with the scissors while Ava glued them on...

Collage

And before we knew it, we had covered our gameboard with more pictures than we anticipated. So we decided to call it a story board - and here, Ava holds up her board and tells a story about the duck who was trying to cross the road and "looked both ways" before crossing...

Collage

So even though we didn't have an agenda when starting this art project - the time together, and process working on it, was the
artful beauty in itself.

Create your own storyboard
1. We go through our recycle bins for inspiration - because when packages are repurposed, they are a whole lot more interesting. Last night's pizza did double duty here... Shoe boxes are another idea...

2. Magazines - I like to keep my parenting issues on the hap chance that I'll use them as references when needed - but who has time? So I contributed some issues to the project and most of the pages that were cut were advertisments anyway. If you don't subscribe to any magazines, pick up the free parenting guides you'll find at your local library or grocery store. What I like about "parenting" magazines is that more than likely you'll find visuals that are kid-friendly.

2. Glue - you can't just have one. Paper items require the delicate streaks from gluesticks, but for heavier or odd shaped items - we love using Aleene's Tacky Glue.

3. Let your kids decide the steps. Sometimes our natural parenting through a process like this would be to clean up along the way, or suggest where to paste items... do this.. don't do that... and so on. But I can't stress enough the importance of letting them work through something like this in its entirety. Parents can engage in projects like this by being the "assistant" - In other words, don't disengage yourself - stand back and watch - but work alongside your child and be there to help. Not only will you be modeling favorable behaviour, but you're also letting your child's creativity take center stage.

Happy storytelling!

if you give a toddler an art box...

Ava's Art box


Chances are, she'll make something. Using every color, and art tool available.


New scissors

Twice. She'll ask for things to glue and practice cutting with her new scissors. All the new pieces she just cut, has to be glued down also. I give Noah his own canvas to work with, and he prefers to swirl his materials in the glue instead. So I let him.

Crafting

She asks for pipe cleaners and then cuts those into small pieces. Noah walks away in mid coloring - he's through. Wandering around the room, he finds the swifer. So he starts to clean.

Cleaning Up

And chances are - if you have a clean playroom, they'll want to make something else. Again.

When inspiration strikes, the supplies have to be ready. We were overwhelmed with the art box Grandma bought Ava for her birthday - with a personalized name plate on top. When Aaron saw this briefcase, his OCD kicked in. And I assured him that I'll do my best to remind her to put every piece back as she uses them. After all, they are "Ava's." The box says so.

Having such a special gift, with more than 200 pieces can make you a little dizzy. We haven't lost a piece yet, and when considering how much she loves to make things, I don't think we will [anytime soon]. Unless of course, other non-art-lovers get a hold of it and make off with the blues and greens.

There's so much value into investing in a box like this - and I would encourage everyone to create something like this for your budding artist.

Start an Art Box:
1. Use a box small enough for her to carry. Preferably one that has a closing mechanism in case she wants to do a twirl before getting started.

2. Gather supplies. You may have many of them at home already, so gather these then visit your local art supply store to look for more creative opportunities: pastels, acrylics, water colors, pencils, crayons, markers [fat and thin ones], a set of paints, and of course, glitter...

3. Organize your box by lining the bottom with a tray that has several components. Or get several small cardboard boxes and label them. You don't have to fill the entire box the first day. Rotate materials or add more colors as others are finished. This keeps her box interesting - and inspiring to try something different each art day.

4. Keep a junk box close by. Yes, junk is inspirational. Think about textures and the ongoing flow of materials that pass through our hands on the way to the garbage. Tissue paper, aluminum foil, popsicle sticks, bubble wrap, cardboard, construction and corrugated papers...

5. Don't forget the tools that will help them get creative. Think brushes [for each style - water color or acrylic], sponges, stamps, scissors, glue, and stencils...

The success of the art box comes directly from the time spent together. Sharing materials, exchanging ideas, and helping each other with suggestions are the added bonuses to a toddler's developmental years.

I love it when Ava tells me, "Mommy, you need more red here..."

the art of being... present

IMG_5040

Every day after lunch, with remnants of food still dabbled on her face, Ava asks for one thing:


"Mom, can we do an art project please?"

I hesitate. Because I know the right thing would be to first have her clean up the dishes with me... then put away leftovers... and her tricycle before Aaron trips over it again... pickup her Scholastic DVD's before Noah sticks them into the VCR... or the Mrs. Potato Head pieces before they are thrown into the abyss of the air vents on the floor.... I know I should stack her library books before another late fine accrues... or get a load of laundry done so their pajama tops match their bottoms...

But the hesitation gets deflected for some reason, and I find myself squirting her tempera paints into an egg carton.

In every color.


IMG_5012

I find myself pulling up a child's chair - and watching her... create something so sporadic with colors in every direction. Suddenly a tree appears in emerald green... then with a wash of purple paint, a bicycle seat appears instead... We make small talk until Noah finds us at the art table. I pull off his sweater and give him a paintbrush. He dips it into a puddle of yellow and them stamps his white space... as if playing the drums.

IMG_5023

He wants a different color for his second paint brush in his other hand - and starts to pull the carton towards him. Ava shrieks, and Noah threatens her with his brush by holding it like a spear. She doesn't give in - she's in the process of mixing more colors and needs close access. They play tug of war until finally, I intervene and remind them about the "middle" of the table.

IMG_5005

But to Noah, the "middle" appears misleading at his height... so he climbs to the top of the table and discovers a more unconventional way to paint - like using his bare feet.

IMG_5026

I picked up Noah in full fledged giggles [he knows not to stand on tables!] and carried him to the bathroom. He laughed when I washed the bottom of his feet. So I pretended they were still dirty so I could hear him laugh even more. We changed his clothes quickly so we could check back with Ava... Too late. She painted both of her palms. Second amateur painter whisked into the bathroom - now flooding a new room with their paint...

In every color.

Their clothes eventually made it through with the loads of laundry later that night... the art table and bathroom counter tops were wiped clean, and their toys once again reunited with their boxes. Stains, clothes, missing pieces of toys... are replaceable. But what can't be is our time with our children. By doing so, we're teaching them the importance of embracing the present, and living passionately.

They do this so naturally, and I remind myself how to do so by following their lead.

Even if they have to go to bed with mis-matched pj's...

is it art?

For the past two decades, I have lived in Dallas believing there was "nothing to do" here except watch movies and eat. That is, until I went prego and my mommy radar was fine tuned into locating family events around town. Each weekend, a handful of new ideas adorn the city calendars - and it's always hard to choose. So we try to catch a city highlight now and then just to try something new in an old corner of our city. Like this weekend. I'd probably never go on my own - but I did after discovering that every first Saturday of the month from 10am to 2pm, the Nasher Sculpture Center opens its doors for families to explore, connect, and nurture their artistic passions.

We missed the art activity - but made it just in time for the scavenger hunt. Which again, forced us to do something we wouldn't normally do - like take notice. So we did. And noticed how each earthly element the artist manifested into a person, shape, or idea.

IMG_3130_2

IMG_3137

IMG_3154

We found all the scangener clues and received a stuffed Target dog as a prize. The kids loved it.
Afterwards, we joined the family tour guide on her quest to show us the exhibits as how they were meant to be questioned. Pablo had us intrigued - how many faces do you see? Is he happy or sad? she asked the group. Great questions to get our little ones thinking about the lines on our faces and how they evoke true or false emotion.

IMG_3158

The tour led us straight into storytime. We listened in on the story
Go Away Big Green Monster - which was an instant hit with the page turner set.

IMG_3164_2

By this time in the afternoon - the heat was becoming too much. We quickly hid inside and discovered a special blues performance playing in the auditorium. After we cooled long enough, it was time to hit the road. The kids were exhausted and we were thrilled. While older kids may enjoy the experience more, our little toddlers did quite well appreciating the art on display. I was the only one however that got noticed by the exhibit guard for touching the display case [who knew you couldn't?].

So if you're near downtown - and want to expose the kids to questionable "art", visit the Nasher Sculpture center the first Saturday each month for free! Then pickup a pack of sculpting clay on your way home to create a gallery of moods the kids are feeling that day. How fun!

LinkWithin

Related Posts Plugin for WordPress, Blogger...